
Paul Diamond Blow's Huggy Talk
Tips, tricks, and advice for graphic designers.
|
Photoshop Tricks: How to Scan, Color Correct, and Process Photographs in Photoshop
Tricks on how to take your photograph scans and make 'em look awesome in Photoshop.
by Paul Ace Diamond "Huggy" Blow
When scanning photographs either for print purposes or for the web I always scan them at 300 dpi at the size I need them. For instance, if I want a nice 8x10 image from a 4x6 photograph I will scan it at 200% scale, 300 dpi. You can always reduce the size of your photo scans for the web later after you've processed them, but processing is always best to do at high resolution.
When scanning photographs I usually use the default scanning software settings and do any color correcting and processing in Photoshop where you have more control and flexibility. Once I've scanned a photograph, the first thing I do is convert it from RGB to CMYK for color correcting. In CMYK mode you have four channels to work with for color correcting vs. three channels in RGB. This is a crucial step if you are going to have your photo scan printed in some sort of media (books, magazines, brochures) where images need to be CMYK, but if your scan is strictly for the web you are better off leaving it in RGB mode. Usually I find that my photo scans are too dark and muddy, so I use the Photoshop "levels" to brighten the highlights and the midtones to my satisfaction and darken the shadows if needed. Often times the Photoshop "auto levels" or "auto color" work well, but most times I prefer to adjust the levels myself.
Once the levels have been adjusted, the next step is to sharpen the scan using Photoshop's "unsharp mask" filter. The problem with sharpening photograph scans, however, is not only will it sharpen the details in the photo you want sharp, but it will also sharpen details you do NOT want sharpened -- for instance, dust specks, scratches, or details that are in the background of the photograph. Here's a good trick on how to sharpen just what you want sharpened...
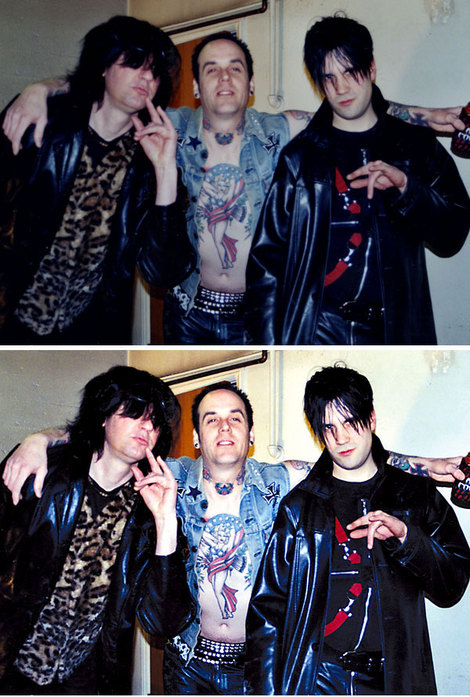
First, before doing any Photoshop "unsharp mask", create a duplicate layer of the scan. You will then have two layers -- the orignal 'background" layer and your new "background copy" layer. You will do your sharpening on this new duplicate layer, with Photoshop's unsharp mask. (The "unsharp mask" settings that I use as a good starting point on 300 dpi photograph scans is: amount = 80%, radius = 2 pixels, threshold=3.) Now that you've got your duplicate layer nice and sharp, use the eraser tool (using an airbrush for the eraser) and erase the parts of the photograph you do not want sharpened... for instance in the photograph I use here as an example I erased all the background behind the three individuals in the photograph. (The photo, by the way, is of rock band the Space Cretins, and I am the good looking guy on the left) You erase on the duplicate layer, of course, which will leave those erased areas showing through on the unsharpened background layer.
If there are any areas in your photograph where there are noticeable dust specks, you can select those areas (on the "background" layer) with the Photoshop lasso tool and apply the "dust and scratches" filter to reduce or eliminate the specks. Be careful though -- if you set this filter too high it can make the selected area look too blurry and not look right with the rest of the unprocessed photo. Often times I use the dust and scratches filter to reduce the specks and then use the Photoshop "clone" tool to clone out any remaining specks. The clone tool also works great for eliminating scratches in photographs, but I save any cloning as my last step in the process.
Once you've got your levels adjusted, sharpened the duplicate layer, erased areas in the duplicate layer you don't want sharpened, and used the "dust and scratches" filter on the background layer, it's time to flatten the image. In case you may want to go back and do reprocessing later on, it is a good idea to save an unflattened version as a photoshop file (.PSD extension) Once flattened, it's time to zoom in on the scan and use the clone tool to clone out any specks, spots, or scratches you may have missed earlier, and then save your scan as a tiff file. If you want a low-res version for the web, downsample the scan to the size you want (for instance, 600 pixels wide) and save as an RGB jpeg.
There you have it... some tricks to getting the most out of your photograph scans. Happy scanning!
More Paul Diamond Blow links: